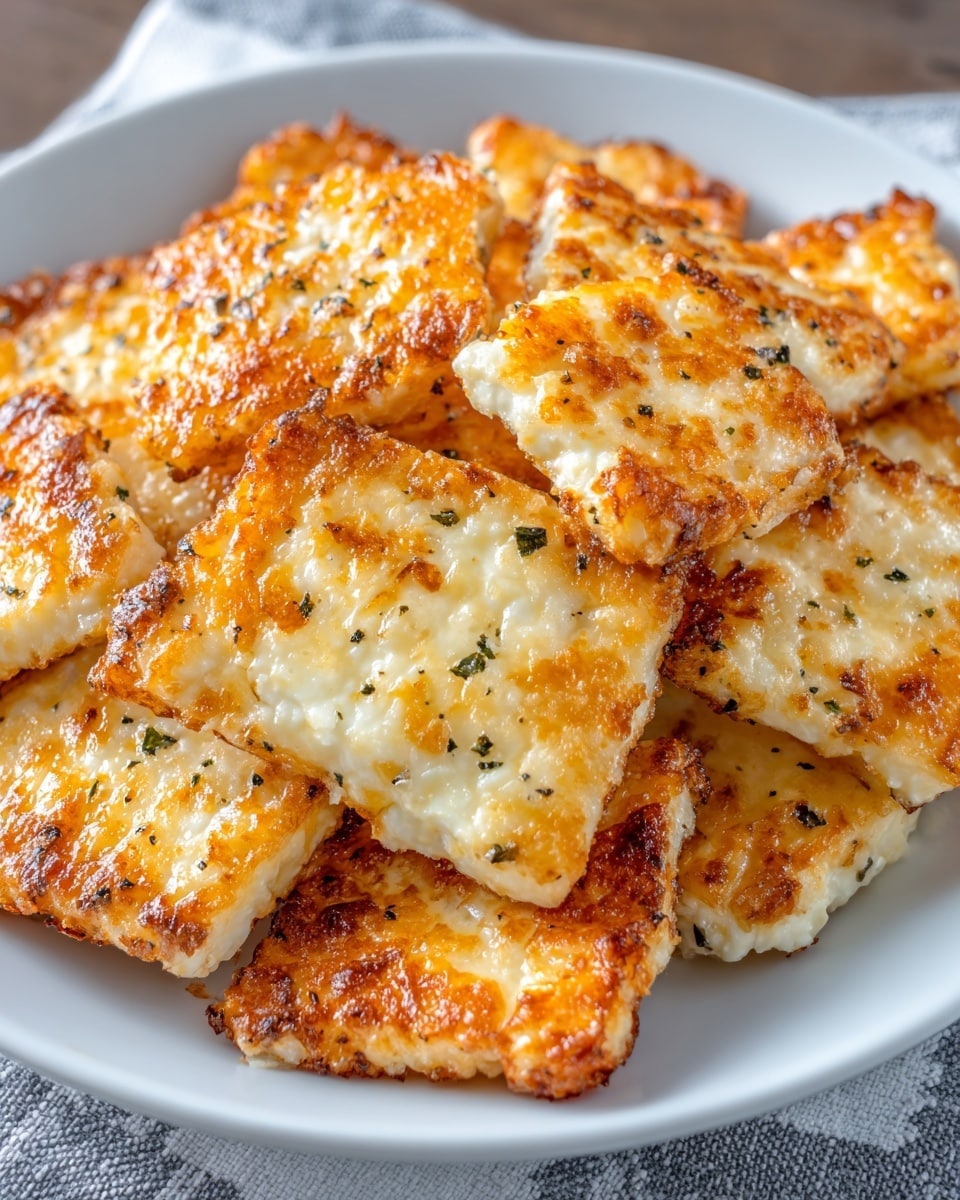
Homemade Cheez-Its Recipe
Introduction
Homemade Cheez-Its are a delicious and simple snack you can make right in your kitchen. With just a few ingredients, you can enjoy a crispy, cheesy treat that’s perfect for anytime munching.
Ingredients
- 1 cup shredded cheddar cheese
- 1 cup all-purpose flour
- 4 tablespoons unsalted butter, cold and cubed
Instructions
- Step 1: Preheat your oven to 375°F (190°C). In a bowl, combine the shredded cheddar cheese, flour, and cubed butter. Mix until the dough comes together into a firm ball.
- Step 2: Roll out the dough on a lightly floured surface to about 1/8-inch thickness. Cut into small squares and place them on a baking sheet lined with parchment paper.
- Step 3: Bake in the preheated oven for 12-15 minutes, or until the crackers are crisp and golden. Let them cool completely before serving.
Tips & Variations
- For extra flavor, sprinkle a pinch of paprika or garlic powder on the dough before baking.
- You can substitute sharp cheddar with other cheeses like gouda or parmesan for different tastes.
- Make sure the butter is cold to help create a flaky texture in the crackers.
Storage
Store homemade Cheez-Its in an airtight container at room temperature for up to one week. To keep them crisp, avoid storing in humid conditions. If they soften, refresh by baking briefly in a low oven for a few minutes.
How to Serve
Serve this delicious recipe with your favorite sides.
FAQs
Can I use pre-shredded cheese for this recipe?
Yes, pre-shredded cheese works well, but fresh shredded cheese often melts better and results in a smoother dough.
How thin should I roll the dough?
Roll the dough to about 1/8-inch thickness to ensure the crackers bake evenly and turn out crisp.
PrintHomemade Cheez-Its Recipe

Homemade Cheez-Its are a delightful, cheesy snack made from scratch using simple ingredients like cheddar cheese, flour, and butter. These crispy crackers are perfect for snacking, entertaining, or adding a flavorful crunch to your cheese board.
- Prep Time: 15 minutes
- Cook Time: 18 minutes
- Total Time: 33 minutes
- Yield: About 48 crackers 1x
- Category: Snack
- Method: Baking
- Cuisine: American
Ingredients
Ingredients
- 1 cup sharp cheddar cheese, grated
- 1 cup all-purpose flour
- 1/4 cup unsalted butter, cold and cubed
- 1/4 teaspoon salt (optional)
- 2–3 tablespoons cold water
Instructions
- Prepare the dough: In a bowl, combine the grated cheddar cheese, flour, and salt if using. Cut in the cold, cubed butter using a pastry cutter or your fingertips until the mixture resembles coarse crumbs. Gradually add cold water, one tablespoon at a time, until the dough comes together and forms a ball.
- Roll out the dough: On a lightly floured surface, roll the dough out evenly to about 1/8 inch thick. Make sure the thickness is consistent to ensure even baking and crispiness.
- Cut the crackers: Using a sharp knife or pizza cutter, cut the dough into small squares, approximately 1 inch by 1 inch. Use a fork to poke holes in the center of each square to help them bake evenly and prevent puffing.
- Bake until crisp: Preheat your oven to 350°F (175°C). Arrange the crackers on a baking sheet lined with parchment paper, making sure they are spaced slightly apart. Bake for about 15-18 minutes, or until the edges turn golden brown and the crackers are crisp. Remove from the oven and let them cool completely on a wire rack before serving.
Notes
- Use sharp cheddar cheese for the best flavor punch in your crackers.
- Ensure butter is cold to get a flaky texture in the crackers.
- Store homemade Cheez-Its in an airtight container for up to one week to maintain crispness.
- You can add spices like paprika, cayenne, or garlic powder to the dough for a flavored twist.
Keywords: Cheez-Its, homemade crackers, cheddar cheese snack, baked cheese crackers, easy snack recipe