No Knead Artisan Bread Recipe
Introduction
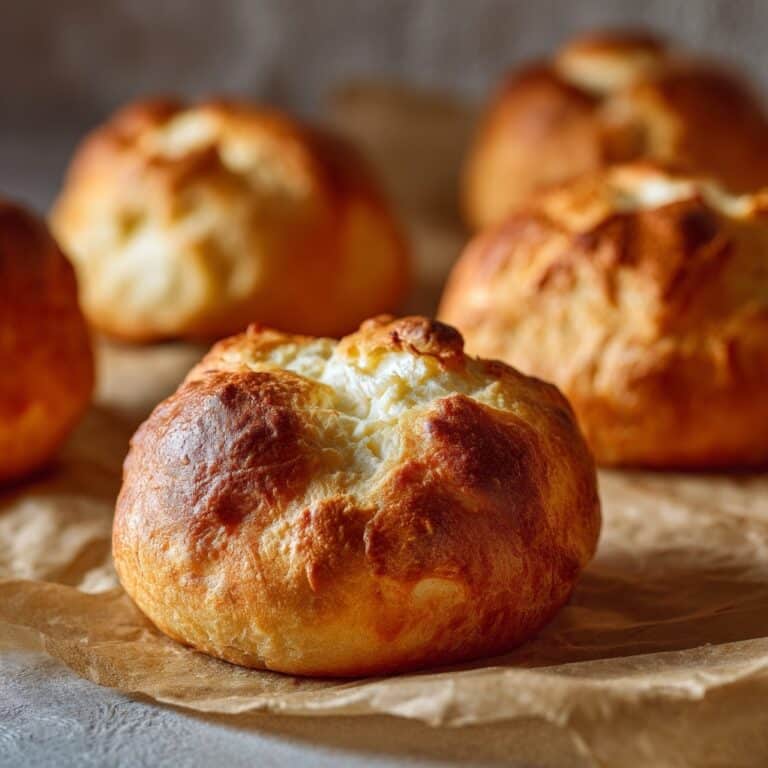
This no knead artisan bread is perfect for home bakers who want a crusty, flavorful loaf without the fuss. With minimal ingredients and simple steps, you’ll enjoy fresh, homemade bread that’s golden and airy inside.

Ingredients
- 3 cups bread flour (or plain/all purpose)
- 1 tablespoon white granulated sugar
- 2 teaspoons dried yeast (instant or rapid rise)
- 1 1/2 teaspoons salt
- 1 1/2 cups warm water
- 1 tablespoon olive oil
Instructions
- Step 1: In a large bowl, combine flour, sugar, yeast, and salt. Add the warm water and olive oil, mixing until all ingredients are incorporated. The dough will be wet, sticky, and shaggy.
- Step 2: Lightly spray the top of the dough with cooking oil spray. Cover the bowl with plastic wrap and place a dry tea towel over it.
- Step 3: Let the dough rise in a warm, draft-free spot for 2 to 3 hours until it doubles in size. It will have bubbles and a wobbly, jelly-like texture.
- Step 4: Place a large (10-inch or 26cm) dutch oven or heavy-based pot with a lid in the oven. Preheat the oven to 450°F (230°C) and heat the pot for 30 minutes.
- Step 5: Lightly flour your work surface and a plastic spatula with up to 1 tablespoon flour. Scrape the dough out onto the surface using the spatula. Sprinkle flour over the dough and fold it over itself 5 to 6 times to form a rough round shape.
- Step 6: Cut a piece of parchment paper large enough to transfer the dough into the pot. Place the paper beside the dough and roll the dough onto it, smooth side up. Center the dough on the paper and reshape if needed.
- Step 7: Loosely cover the dough with plastic wrap and let it rest while the oven finishes preheating.
- Step 8: Using oven mitts, carefully remove the hot dutch oven from the oven. Lift the dough by holding the ends of the parchment paper and place it inside the pot.
- Step 9: Cover the pot with the lid and bake for 30 minutes. Then remove the lid and bake for another 12 to 15 minutes until the loaf is golden brown.
- Step 10: Transfer the bread to a wire rack and let it cool for 10 minutes before slicing.
Tips & Variations
- Use bread flour for a chewier texture or all-purpose flour for a softer crumb.
- For extra flavor, add a tablespoon of herbs or garlic powder to the dry ingredients.
- Make sure the water is warm, not hot, to help activate the yeast without killing it.
- If you don’t have a dutch oven, use any heavy pot with a lid that can withstand high heat.
Storage
Store the bread in a paper bag or wrapped in a kitchen towel at room temperature for up to 2 days to keep the crust crisp. For longer storage, slice and freeze the bread in an airtight bag. Reheat slices in a toaster or oven to restore freshness.
How to Serve
Serve this delicious recipe with your favorite sides.
FAQs
Can I use active dry yeast instead of instant yeast?
Yes, but activate the active dry yeast in warm water with a pinch of sugar for about 5 to 10 minutes before mixing it into the flour.
Do I need to knead the dough?
No kneading is required for this recipe. The long rise time develops the gluten and texture, giving you a light artisan loaf without the work.
PrintNo Knead Artisan Bread Recipe
This No Knead Artisan Bread recipe delivers a crusty, golden loaf with a soft, chewy interior using a simple, hands-off method. With minimal ingredients and effort, this bread is perfect for beginners and busy bakers alike. The dough requires no kneading and bakes in a preheated Dutch oven to achieve a professional-quality crust and texture.
- Prep Time: 15 minutes
- Cook Time: 45 minutes
- Total Time: 2 hours 52 minutes
- Yield: 12 servings 1x
- Category: Bread
- Method: Baking
- Cuisine: American
Ingredients
Dry Ingredients
- 3 cups bread flour (or plain/all purpose)
- 1 tablespoon white granulated sugar
- 2 teaspoons dried yeast (instant or rapid rise)
- 1 1/2 teaspoons salt
Wet Ingredients
- 1 1/2 cups warm water
- 1 tablespoon olive oil
Instructions
- Mix Ingredients: In a large bowl, combine the flour, sugar, yeast, and salt. Add the warm water and olive oil, stirring to fully incorporate. The dough will be wet, sticky, and shaggy in texture.
- First Proof: Lightly spray the top of the dough with cooking oil spray, cover with plastic wrap, then place a dry tea towel over it. Let the dough rest in a warm, draft-free place for 2 to 3 hours until doubled in size and bubbly with a jelly-like wobble.
- Preheat Oven and Dutch Oven: Thirty minutes before baking, place a large (10-inch or 26cm) Dutch oven or heavy-based pot with its lid into the oven. Preheat the oven to 450°F (230°C).
- Shape the Dough: Lightly flour the work surface and a plastic spatula with up to 1 tablespoon of flour. Scrape the dough onto the surface using the spatula, sprinkle the top with a large pinch of flour, and fold it over itself 5-6 times to form a rough, round shape.
- Prepare for Baking: Cut a large piece of parchment paper for easy transfer. Place it next to the dough and roll the dough onto the paper, smoothing the top. Center the dough on the paper and reshape if needed. Let it rest loosely covered with plastic wrap while the oven finishes preheating.
- Transfer to Dutch Oven: Using oven mitts, carefully remove the hot Dutch oven from the oven. Lift the dough by the edges of the parchment paper and place it into the Dutch oven.
- Bake Covered: Cover the Dutch oven with the lid and bake for 30 minutes to trap steam and develop the crust.
- Bake Uncovered: Remove the lid and bake for an additional 12-15 minutes until the loaf is beautifully golden brown and crusty.
- Cool: Transfer the bread to a wire rack and let cool for 10 minutes before slicing for the best texture and flavor.
Notes
- For best results, use bread flour, but all-purpose flour also works.
- Dough is very sticky and wet; avoid adding excess flour during shaping to maintain crumb texture.
- Proofing time may vary depending on room temperature; ensure dough doubles and is bubbly before baking.
- Heating the Dutch oven before baking is essential to create steam and achieve a crispy crust.
- Letting the bread cool slightly helps set the crumb and improves slicing.
Keywords: No Knead Bread, Artisan Bread, Easy Bread Recipe, Dutch Oven Bread, Homemade Bread